Growing Potatoes in Buckets: What You Need to Know

Table of Contents
Growing Potatoes in Buckets: What You Need to Know
Imagine harvesting a lot of potatoes right in your backyard, even if you don’t have much space.
Container gardening makes this dream come true. Using buckets is a smart way to start. It lets you control the growing environment, so you can start early and harvest faster.
This method works in many places, from tiny balconies to big gardens. With the right tips, you can have a great harvest. And enjoy the fresh taste of potatoes you dug yourself.
The Benefits of Growing Potatoes in Buckets
Growing potatoes in buckets is great for city gardeners and those with little space. It lets you control the growing area better, which can mean faster harvests. You can get a lot of potatoes, even in tiny spaces.
Space Efficiency for Urban Gardeners
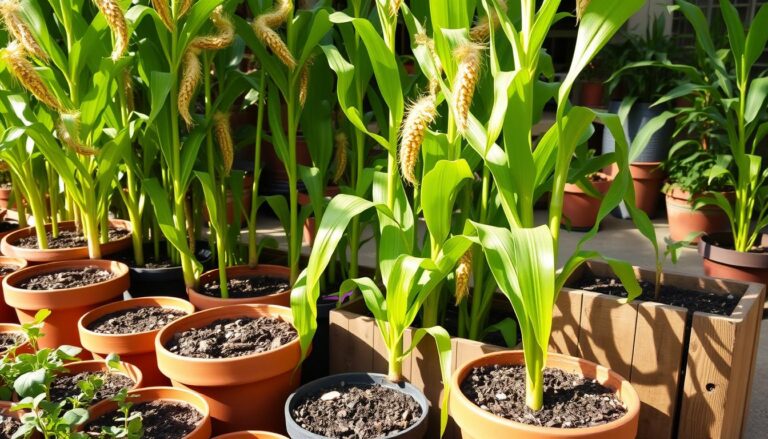
Bucket potato farming is very space-friendly. City gardeners can grow potatoes on balconies, patios, or indoors if it’s light enough. It’s perfect for those with little room to garden.
Improved Pest and Disease Control
Using buckets to grow potatoes helps control pests and diseases. A special soil mix and keeping buckets off the ground cuts down on problems. This keeps your plants healthier.
Easier Harvesting Process
Harvesting potatoes from buckets is easy. Just wait until the plants turn yellow and die back. Then, tip out the bucket to get your potatoes. This way, you don’t have to dig a lot, saving your back and time.
| Benefits | Description |
|---|---|
| Space Efficiency | Ideal for urban gardeners with limited space, allowing for potato cultivation in small areas. |
| Pest and Disease Control | Controlled environment reduces the risk of pests and diseases, promoting healthier plants. |
| Easier Harvesting | Simplifies the harvesting process by avoiding extensive digging, making it more efficient. |
Selecting the Right Containers for Your Potato Plants
The container you pick for growing potatoes is key. It can make or break your DIY potato growing. Several factors are important for a healthy and productive crop.
Bucket Size and Material Considerations
The size and material of your container matter a lot. A bigger container means more soil for your potatoes to grow in.
Food-Grade vs. Regular Buckets
Choosing between food-grade and regular buckets is crucial. Food-grade buckets are safer because they’re made for food storage. They won’t harm your potatoes with chemicals.
Optimal Depth and Width
The depth and width of your container are also key. Aim for a depth of at least 12 inches for root growth. The width should fit multiple seed potatoes.
| Container Dimension | Ideal Size | Benefits |
|---|---|---|
| Depth | 12-18 inches | Allows for deeper root growth and more soil volume |
| Width | 18-24 inches | Accommodates multiple seed potatoes and improves soil aeration |
Drainage Requirements
Drainage is crucial for potatoes in containers. Without it, water can cause root rot and diseases. Make sure your container has adequate drainage holes to avoid waterlogging.
Alternative Container Options
If buckets aren’t your choice, think about grow bags or large tubs. These alternatives can be just as good for growing potatoes.
Choosing the right container is the first step to a successful harvest. Think about size, material, and drainage to make your DIY potato growing a success.
Choosing the Best Potato Varieties for Container Growing
Choosing the right potato variety is key for a great harvest in containers. You have many options, based on your preferences and your garden’s conditions.
Early Season Varieties
Early season potatoes grow fast, ready in 70 to 100 days. They’re great for containers because they produce quickly. ‘Nicola’ and ‘Red Bliss’ are popular choices for small spaces.
Mid-Season Options
Mid-season potatoes take 100 to 120 days to grow. They give more yield than early ones and work well in bigger containers. ‘Katahdin’ and ‘All Blue’ are good for mid-season in buckets.
Late Season Potatoes
Late season potatoes need the most time, over 120 days. They’re harder to grow in containers but are loved for their taste and keeping qualities. ‘Russet’ potatoes are a favorite for late season.
Specialty Varieties That Thrive in Buckets
Some potatoes are perfect for containers. ‘Purple Peruvian’ and ‘Red Thumb’ are tasty and add color to your garden.
| Variety | Maturation Days | Yield Characteristics |
|---|---|---|
| Nicola | 70-100 | Compact, high yield |
| Katahdin | 100-120 | High yield, good storage |
| Russet | 120+ | High yield, excellent storage |

By picking the right potato variety, you can have a successful harvest. Think about maturation days, yield, and disease resistance when choosing.
Essential Supplies and Preparation Steps
To grow potatoes in buckets, you need the right supplies and preparation. Growing potatoes in containers is rewarding but requires careful planning. Start by preparing everything you need.
Soil Mix Requirements for Container Potatoes
The right soil mix is key for healthy container potatoes. You need a mix that drains well and is rich in organic matter. A good compost can make the soil better, leading to more potatoes.
Use a mix made for containers. It keeps moisture but drains excess water.
Tools and Materials Checklist
Before planting, gather all the tools and materials you need. Here’s a list to help you:
| Tool/Material | Description | Quantity |
|---|---|---|
| Buckets | Large containers with drainage holes | As needed |
| Soil Mix | Well-draining mix rich in organic matter | Enough to fill buckets |
| Seed Potatoes | Certified disease-free potatoes for planting | As needed |
Preparing Your Buckets for Planting
Getting your buckets ready is crucial for growing potatoes. First, clean the buckets well. Then, drill holes in the bottom for drainage.
Fill the buckets with soil mix, leaving space for the seed potatoes and more soil.
Step-by-Step Guide to Growing Potatoes in Buckets
To grow potatoes in containers, follow this guide for bucket gardening. It will help you get a good harvest from your buckets.
Preparing and Chitting Seed Potatoes
First, prepare your seed potatoes. Chitting means letting them sprout before planting. Place them with the ‘eyes’ up in a cool, light spot (around 40-50°F) for 2-4 weeks. This helps them grow strong shoots early.
Planting Techniques
Make sure your buckets have holes for drainage. Fill them with potting mix, leaving space for more soil. Plant one or two chitted seed potatoes per bucket, with shoots up. Cover them with about 6 inches of soil.
Depth and Spacing
Plant seed potatoes deep enough for soil coverage but not too deep. Aim for 6-8 inches deep. Also, space buckets well for air and easy access.
Initial Watering
Water your plants well after planting. Keep the soil moist but not too wet. This first watering helps settle the soil and aids in germination.
The “Hilling” Process Explained
As plants grow, add more soil or compost around the stems. Leave a few leaves exposed. This “hilling” process encourages more tubers to form. Keep adding soil until the bucket is almost full, without harming the stems.
Monitoring Growth Stages
Watch your plants closely as they grow. Look out for pests, diseases, or nutrient issues. Check the soil moisture often and water as needed. When plants flower and turn yellow, it’s time to harvest.
Watering and Fertilizing Container Potatoes
To get the most from urban potato farming, knowing how to water and fertilize is key. Growing potatoes in buckets needs a mix of both to keep plants healthy and yield a good harvest.
Watering Schedule and Techniques
Watering is vital for container potatoes. They need steady moisture, more so when they’re making tubers. Water your potatoes when the soil’s top inch feels dry.
Signs of Under and Overwatering
Too much water can cause rot and diseases. Too little water stresses the plants. Look for yellow leaves and soft stems for overwatering. Wilted leaves and slow growth mean underwatering. Adjust your watering to keep the soil just right.
Seasonal Adjustments
In hot summers, you’ll need to water more often. In cooler times, you can water less. Always check the soil before you water.
Fertilizer Types and Application Methods
Fertilizing is also key for growing potatoes in buckets. Use a balanced, slow-release fertilizer when you plant. When plants are 6 inches tall, use a high-phosphorus fertilizer to help with tuber growth.

| Fertilizer Type | Application Time | Benefits |
|---|---|---|
| Balanced, slow-release fertilizer | At planting | Provides overall nutrients for plant growth |
| High-phosphorus fertilizer | When plants are 6 inches tall | Promotes tuber formation and development |
Signs of Nutrient Deficiencies and Solutions
Nutrient shortages show up in different ways. Yellow leaves mean a lack of nitrogen, while scorched edges are a sign of potassium shortage. Keep an eye on your plants and adjust your fertilizing as needed. Foliar feeds can quickly fix specific issues.
By following these tips for watering and fertilizing, you’ll be on your way to a successful potato harvest from your buckets.
Troubleshooting Common Problems in Bucket Potato Farming
Knowing how to fix common issues is key to successful bucket potato farming. You might face problems with pests, diseases, and plant growth. It’s important to solve these problems to get a good harvest.
Pest Management for Container Potatoes
Pests can harm your potato crop. It’s vital to watch for them and manage them well.
Colorado Potato Beetles
Colorado potato beetles are a big problem for potatoes. They can eat a lot of leaves, hurting your yield. You can control them by picking them off or using organic sprays.
Aphids and Other Common Pests
Aphids, wireworms, and other pests can damage your potatoes. Neem oil or insecticidal soap can fight these pests. Always check your plants for pests early.
Disease Prevention and Treatment
Diseases can harm your container potatoes. It’s important to prevent and treat diseases early.
Blight Management
Potato blight is a serious disease. It can destroy your crop. Remove sick leaves and use fungicides to stop it from spreading.
Rot and Fungal Issues
Too much water can cause rot and fungal problems. Make sure your containers drain well and don’t overwater.
Addressing Growth and Development Issues
Problems with growth and development can happen. They might be due to lack of nutrients, not enough sunlight, or wrong watering. Make sure your potatoes get enough sunlight and use the right fertilizer.
By understanding and fixing these common problems, you can increase your chances of a good harvest. Keep an eye on your plants and act quickly to keep them healthy.
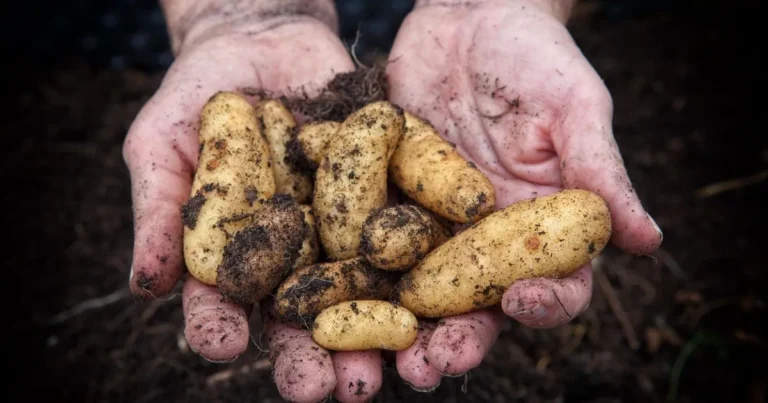
Harvesting and Storing Your Bucket-Grown Potatoes
When your potted potato plants are ready, it’s time to harvest. Growing potatoes in buckets is rewarding. With the right steps, you’ll have a great harvest.
When and How to Harvest
Harvesting at the right time is key for a good yield. For bucket-grown potatoes, this is 70 to 100 days after planting. The plants will turn yellow and die back when it’s time.
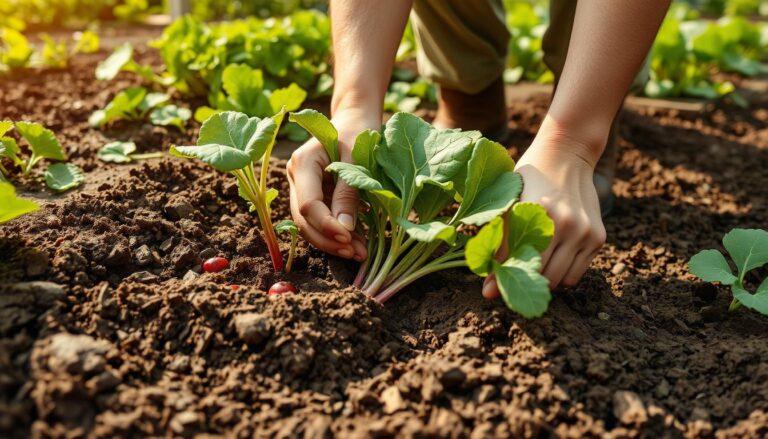
To harvest, dig into the bucket with a fork. Be gentle to avoid damaging the tubers.
Tips for Harvesting:
- Check for readiness by gently feeling around the bucket for tubers.
- Harvest on a dry day to reduce the risk of disease.
- Use a fork to gently loosen the soil around the tubers.
The Curing Process for Longer Storage
After harvesting, curing your potatoes is crucial. Curing means keeping them in a cool, humid place for about two weeks. This helps heal any wounds, preventing rot during storage.
“Curing potatoes after harvest is a simple yet effective way to extend their storage life,” says Jane Doe, a seasoned gardener. “By allowing the tubers to heal, you can enjoy your homegrown potatoes for months to come.”
Storage Methods for Maximum Freshness
To keep your potatoes fresh, store them in a cool, dark place. Make sure it has good ventilation. Don’t store potatoes near apples or other fruits. They release ethylene gas, which can make potatoes spoil faster.
Storage Tips:
- Use breathable containers like burlap sacks or paper bags.
- Keep the storage area at a consistent refrigerator-like temperature.
- Check on your stored potatoes regularly to remove any that are sprouting or rotting.
By following these guidelines, you can enjoy your bucket-grown potatoes all year long.
Conclusion: Enjoying the Rewards of Your Bucket Potato Garden
Growing potatoes in buckets is a rewarding experience. It gives you a bountiful harvest, even in small spaces. By following the steps in this article, you’ve grown your own potatoes. This way, you can enjoy fresh, homegrown spuds, no matter how little space you have.
Enjoying your harvest brings more than just food. Growing potatoes in buckets helps control pests and diseases. It also makes harvesting easier and lets you enjoy a meal made from your own ingredients. Whether you’re new to gardening or experienced, harvesting your bucket-grown potatoes is very rewarding.
This innovative gardening method lets you enjoy your hard work and use your space wisely. So, enjoy the taste of your freshly harvested potatoes. Appreciate the simplicity and rewards of growing spuds in buckets.