7 Essential Steps for Growing Vegetables Indoors: A Year-Round Harvest Guide
Imagine for a moment that it is the dead of February. The world outside your window is painted in stark shades of grey and white, the wind is howling against the glass, and the supermarket produce aisle offers nothing but pale, rock-hard tomatoes that taste more like cardboard than fruit.
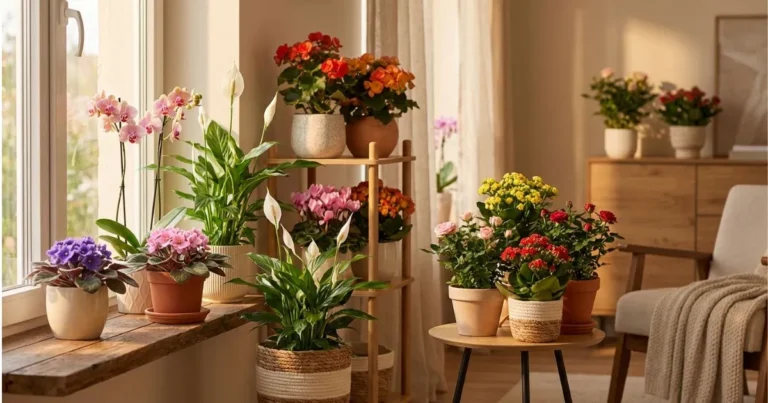
Now, shift your perspective. Imagine walking into your living room, where the air is rich with the earthy scent of damp soil and vibrant green leaves. You reach out and pluck a handful of aromatic basil, a few sprigs of thyme, or a crisp, tender lettuce leaf for your dinner.
Growing vegetables indoors isn’t just about food security or saving a few dollars at the grocery store; it is a quiet act of defiance against the seasons. It is a way to reclaim a connection to nature within our modern, climate-controlled boxes. Whether you are working with a sprawling sunroom or a single windowsill in a studio apartment, the joy of watching life emerge from the soil is a universal balm for the soul.
You don’t need a green thumb or a farmhouse to make this happen. You simply need to understand what plants crave. This guide will walk you through exactly how to turn your indoor space into a lush, edible sanctuary, regardless of the weather outside.
Table of Contents
1. Assessing Your Space: Light, Temperature, and Humidity
Before you buy a single seed packet, you need to audit your environment. Plants are eager to grow, but they are biologically programmed to need specific triggers. The biggest hurdle when growing vegetables indoors is replicating the intensity of the sun.
The Light Equation
Your human eyes are incredibly adaptable; they adjust to dim rooms so well that you might think a spot is “bright,” while a plant sees it as deep shade. The direction your windows face dictates what you can grow naturally.
- South-Facing Windows: These are the gold standard. They provide the strongest intensity and the longest duration of light. If you hope to grow fruiting crops like cherry tomatoes or peppers without artificial help, this is where they belong.
- East and West-Facing Windows: These offer moderate light. They are generally excellent for leafy greens, herbs, and root vegetables that don’t require the intense solar energy needed to produce fruit.
- North-Facing Windows: These provide consistent, but weak, indirect light. While low-light houseplants might survive here, most vegetables will struggle without supplemental lighting.
Temperature Consistency
Most vegetables you’ll want to eat prefer the same temperatures you do: between 60°F and 75°F (15°C–24°C). However, you must watch out for micro-climates in your home. A windowsill might be 50°F in winter due to drafts, or 90°F in summer due to trapped heat. Avoid placing plants directly near radiator vents, fireplaces, or drafty door frames, as rapid temperature fluctuations can shock them into dropping leaves.
Battling Dry Air
Winter heating systems strip moisture from the air, often dropping indoor humidity below 20%. Most vegetables prefer 40-50% humidity. If your skin feels dry, your plants are likely suffering too. You can remedy this by:
- Grouping plants together (they create a micro-humid environment through transpiration).
- Placing pots on “humidity trays”—saucers filled with pebbles and water.
- Using a standard room humidifier.
For more on environmental zones and plant hardiness, you can reference the USDA Plant Hardiness Map, which often has relevance for how much natural light you can expect in winter.
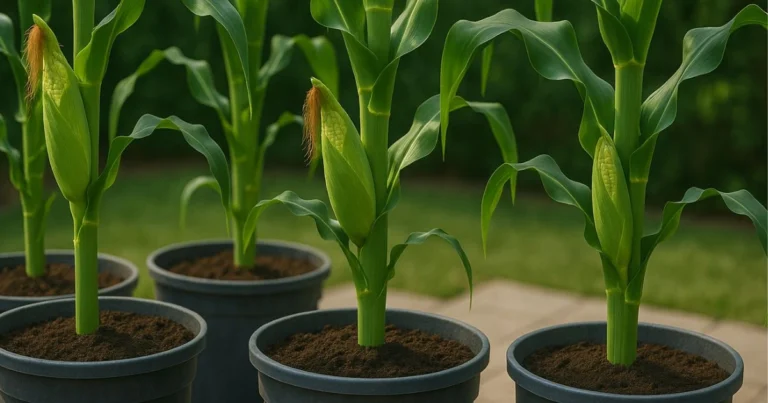
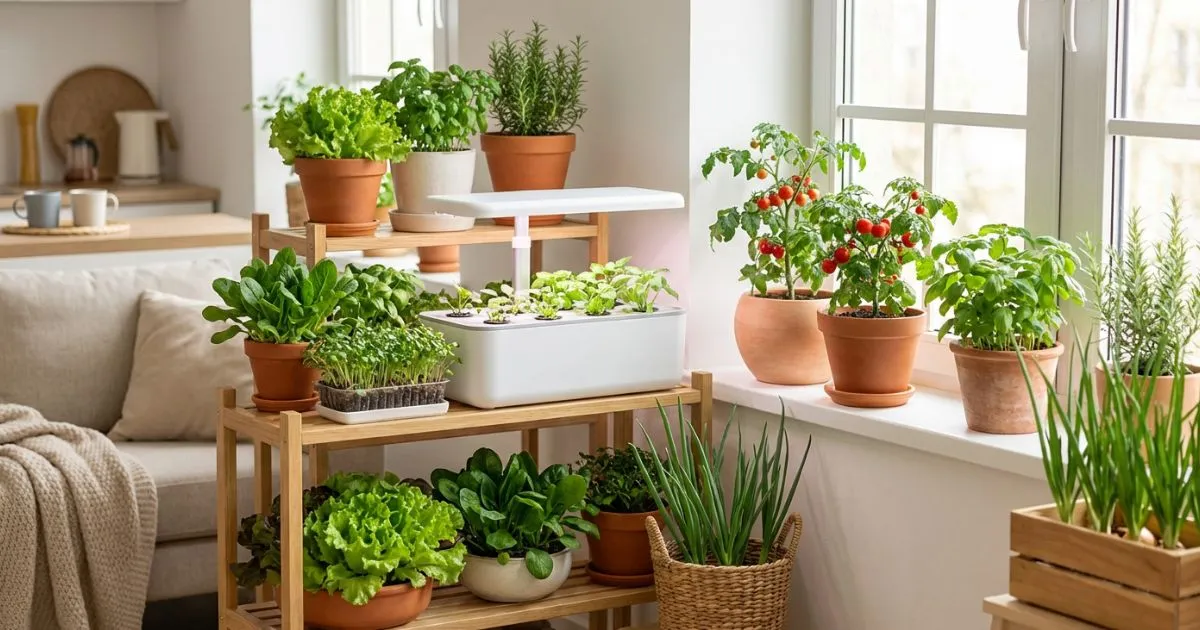
2. Choosing the Best Vegetables to Grow Indoors
Not all plants are created equal when it comes to indoor life. Trying to grow a beefsteak tomato inside is a recipe for heartbreak, but other crops thrive in containers. We can categorize these by difficulty level.
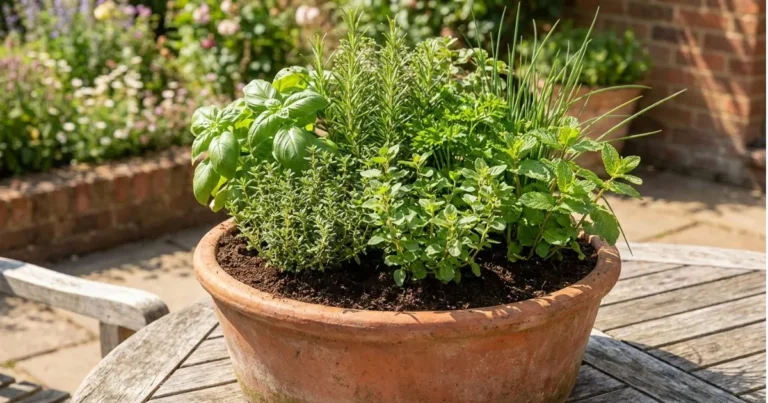
The “Sure-Fire” Winners (Beginner)
If this is your first time growing vegetables indoors, start here. These plants tolerate lower light and handle the confined space of a pot gracefully.
- Leafy Greens: Loose-leaf lettuce, spinach, arugula, and kale are the champions of indoor gardening. They have shallow roots and don’t need full sun.
- Herbs: Basil, mint, chives, parsley, and cilantro. Nothing beats the flavor of herbs cut seconds before use.
- Microgreens: These are seedlings harvested when they are just a few inches tall. They are ready in as little as two weeks and are packed with nutrients.
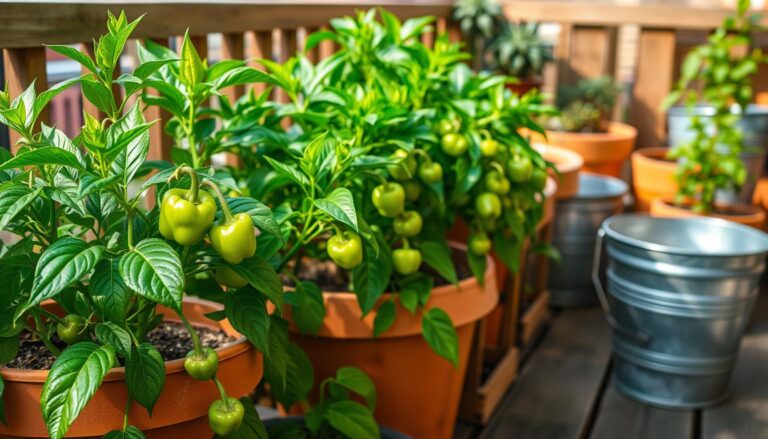
The “Worth the Effort” Crops (Intermediate)
Once you have mastered greens, you can graduate to fruiting plants and roots. These require more light (usually grow lights) and patience.
- Tomatoes: Specifically, look for “determinate,” “dwarf,” or “patio” varieties. Cultivars like Tiny Tim or Red Robin are bred to stay under 18 inches tall.
- Peppers: Chili peppers adapt surprisingly well indoors. They are perennials, meaning if you keep them warm and lit, they can produce for years.
- Radishes: These are the speed demons of the vegetable world, often going from seed to harvest in 25 days.
- Carrots: You won’t grow massive carrots, but round varieties (like Paris Market) or short varieties (like Little Finger) do very well in pots.
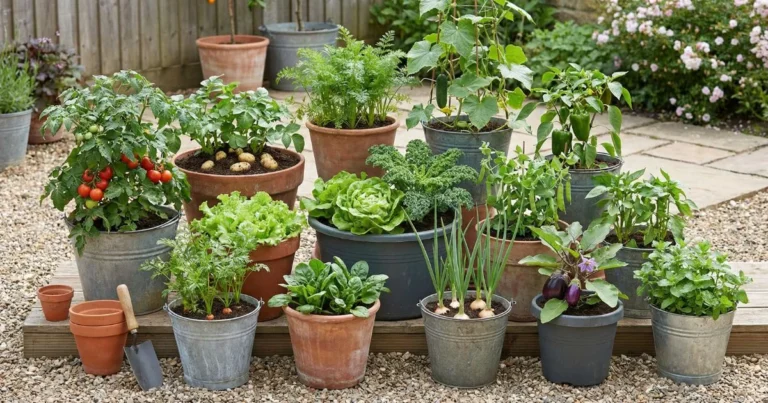
3. The Foundation: Containers and Soil Selection
This is where many new indoor gardeners fail. They go outside, dig up some dirt from the yard, put it in a pot without holes, and wonder why their plants die. When growing vegetables indoors, the mechanics of the soil are different than growing in the ground.
Selecting the Right Pots
You can use almost anything as a container—from expensive ceramic pots to recycled yogurt tubs—provided it meets two criteria:
- Drainage Holes: This is non-negotiable. Without holes, water sits at the bottom, the roots suffocate, and rot sets in.
- Volume: Greens need a depth of 4-6 inches. Tomatoes and peppers need at least 12 inches of depth and significantly more volume (2-5 gallons).
Material matters, too. Terra cotta is porous and breathes, wicking moisture away from the soil. This is great if you tend to overwater. Plastic and glazed ceramic hold moisture in, which is better if you are forgetful about watering.
The Perfect Soil Mix “Recipe”
Never use garden soil. It is too heavy, it compacts in pots, and it often brings indoor pests like aphids or worms into your home. You need a “soilless” potting mix that is light, fluffy, and sterile.
While you can buy pre-made organic potting mix, making your own is often cheaper and more effective for vegetables.
Table: DIY Potting Mix Recipe for Indoor Veggies
| Ingredient | Ratio | Purpose |
|---|---|---|
| Coco Coir or Peat Moss | 2 Parts | The base. It retains moisture while staying light and fluffy. |
| Perlite or Vermiculite | 1 Part | These white volcanic rocks improve aeration and drainage, preventing root rot. |
| High-Quality Compost | 1 Part | Provides the nutrient base and beneficial microbes. |
| Worm Castings | 1/2 Part | A “superfood” fertilizer boost that is gentle on seedlings. |
Mix these ingredients in a large bucket or tub, adding water until the mix is damp like a wrung-out sponge, before filling your pots.
4. Let There Be Light: Using Grow Lights
If you rely solely on windows in the winter, your plants may become “leggy”—tall, thin, and weak as they stretch desperately toward the glass. To get robust, crunchy vegetables, you likely need to supplement with grow lights.
Why Windows Often Fail
Modern windows are often treated to block UV rays and heat. While great for your energy bill, this filters out parts of the spectrum plants use. Furthermore, in winter, the daylight hours are simply too short for vegetables like peppers that originated in the tropics.
Types of Lights
- Full Spectrum LED: These are the modern standard. They are energy-efficient, run cool (so they won’t burn your plants), and provide the full range of light color needed for foliage and fruit. Look for “white” full-spectrum lights rather than the old “blurple” (blue/purple) ones, as they are easier on your eyes.
- Fluorescent (T5): These are excellent for starting seeds and growing leafy greens. They are inexpensive but may not be powerful enough for flowering tomatoes.
Setup and Duration
For growing vegetables indoors, timing is key.
- Leafy Greens & Herbs: 10–12 hours of light per day.
- Fruiting Crops: 14–16 hours of light per day.
Pro Tip: Keep the lights close! LEDs should be 6–12 inches above the top of the plants. As the plants grow, raise the lights. If the light is too far away, the energy dissipates before it hits the leaves.
For in-depth reviews on lighting systems, check resources like the Royal Horticultural Society or dedicated gardening tech blogs.
5. Watering and Fertilizing: The Art of Maintenance
In an outdoor garden, nature handles some of the watering and worms renew the soil. Indoors, you are the god of this micro-universe. Everything the plant gets, you must provide.
The Finger Test
Overwatering kills more indoor plants than underwatering. The surface of the soil might look dry while the bottom is a swamp.
To water correctly, stick your finger into the soil up to the second knuckle.
- If it feels damp: Do not water.
- If it feels dry: Water thoroughly until water runs out the bottom drainage holes.
Bottom Watering: A great technique for small pots is to place them in a tray of water for 30 minutes. The soil wicks the water up from the bottom. This encourages deep root growth and keeps the top of the soil dry, which discourages pests like fungus gnats.
Feeding Your Crops
Potting mix is sterile (mostly). Once your plants use up the compost you added, they will starve. Because vegetables are “heavy feeders”—meaning they consume a lot of energy to grow edible parts—you need to fertilize.
- Use a liquid organic fertilizer (like seaweed extract or fish emulsion) diluted to half-strength.
- Apply every 2 weeks during the active growing phase.
- Avoid chemical fertilizers with high salt content, as salts can build up in the pot and burn the roots.
6. Pollination and Pest Control
You have the light, the soil, and the water. But there are no bees in your living room (hopefully). If you are growing leafy greens, this doesn’t matter. But if you are growing vegetables indoors that fruit—like tomatoes, peppers, or beans—you have to do the work of the insects.
Be the Bee
Most vegetables are self-fertile, meaning the pollen just needs to move from one part of the flower to another.
- The Shake Method: Gently shake the stems of your tomato or pepper plants once a day while they are flowering. This dislodges the pollen and ensures fertilization.
- The Brush Method: For higher success rates, take a small, soft paintbrush or a cotton swab. Twirl it gently inside one flower, then move to the next. Do this daily when flowers are open.
Managing Unwanted Guests
It is a myth that indoor plants don’t get bugs. In fact, without natural predators like ladybugs to eat them, pest populations can explode indoors.
- Aphids & Spider Mites: If you see sticky residue or webbing, wash the plant leaves in the shower or sink with a gentle spray of water. Follow up with a spray of Neem Oil or insecticidal soap.
- Fungus Gnats: These are tiny black flies that buzz around the soil. They love wet dirt. To stop them, let the top inch of your soil dry out completely between waterings, and use yellow sticky traps to catch the adults.
7. Harvesting and Regrowing
The moment of truth has arrived. Harvesting is the reason you started growing vegetables indoors in the first place.
Harvest Often
Don’t be afraid to pick your produce. For herbs and leafy greens, harvesting actually stimulates the plant to grow more.
- Basil: Always cut just above a pair of leaves. Two new stems will grow from that point, making your plant bushier.
- Lettuce (Cut and Come Again): Don’t pull the whole head of lettuce. Instead, use scissors to trim off the outer, largest leaves. The center of the plant will continue to push out new baby leaves, giving you a salad every few days for weeks.
Kitchen Scrap Gardening
Before you compost your store-bought veggies, check if you can regrow them.
- Green Onions: Cut the green tops off for cooking, but leave the white bulb with the roots. Placed in a glass of water (and eventually soil), they will regrow their green tops in days.
- Celery and Bok Choy: Place the base of the stalk in a shallow dish of water. Once roots appear and new leaves sprout from the center, transplant it into your potting mix.
FAQ: Common Questions About Growing Vegetables Indoors
Q: Is growing vegetables indoors expensive?
It doesn’t have to be. While high-end grow lights can be an investment, you can start with a sunny window, recycled containers, and a packet of seeds for under $20. The return on investment—fresh herbs that would cost $4 a bunch at the store—is often very high.
Q: Do vegetables grow slower indoors?
Generally, yes. Even with good grow lights, the intensity of energy is rarely as high as direct mid-summer sunlight. You should expect your harvest dates to be a week or two later than what is listed on the seed packet.
Q: Can I use regular garden soil for growing vegetables indoors?
No. Garden soil is too dense for containers and will compact, suffocating roots. It also introduces outdoor pests and diseases into your home. Always use a sterile potting mix.
Q: What is the easiest vegetable to grow indoors for a child?
Radishes or microgreens are ideal for children. They have large seeds that are easy to handle, and they germinate and grow very quickly, keeping kids engaged with the process.
Conclusion: Your Indoor Harvest Awaits
Growing vegetables indoors is a journey of experimentation. You might kill a few basil plants or drown a cactus, and that is okay. It is part of the learning process. But the rewards—the burst of flavor from a home-grown cherry tomato in January, the smell of fresh mint tea, and the satisfaction of nurturing life—are tangible and profound.
Start small. Perhaps begin with a single pot of basil or a tray of microgreens on your kitchen counter. As you gain confidence, expand your indoor Eden. You don’t need acres of land to be a gardener; you just need a pot, a seed, and a little bit of light.
So, what are you waiting for? Get your hands dirty and bring the garden inside.