8 Steps on How to Start Tomato Seeds Indoors for a Perfect Harvest
There is a specific kind of silence that settles over the world in late winter. The ground is often hard, the trees are skeletal against a gray sky, and the air carries a bite that makes you pull your collar up tight. Inside, the house feels sealed off, a warm but sterile bubble separated from the natural world.
But then, you open a packet.
Inside that small paper envelope lies a handful of rough, beige specks. They look like nothing—certainly not like vibrant life or the taste of summer. Yet, holding them in your palm is an act of profound faith. You are holding the promise of July in the dead of February. This is the “gardener’s patience,” the quiet thrill of knowing that with a little bit of soil, water, and warmth, you can coax life out of dormancy.
While it is easy to drive to a nursery in spring and buy a transplant that someone else grew, you miss the magic. Learning how to start tomato seeds yourself offers a deeper connection to your food. It gives you access to thousands of heirloom varieties that big-box stores simply don’t carry—flavors that have been passed down for generations.
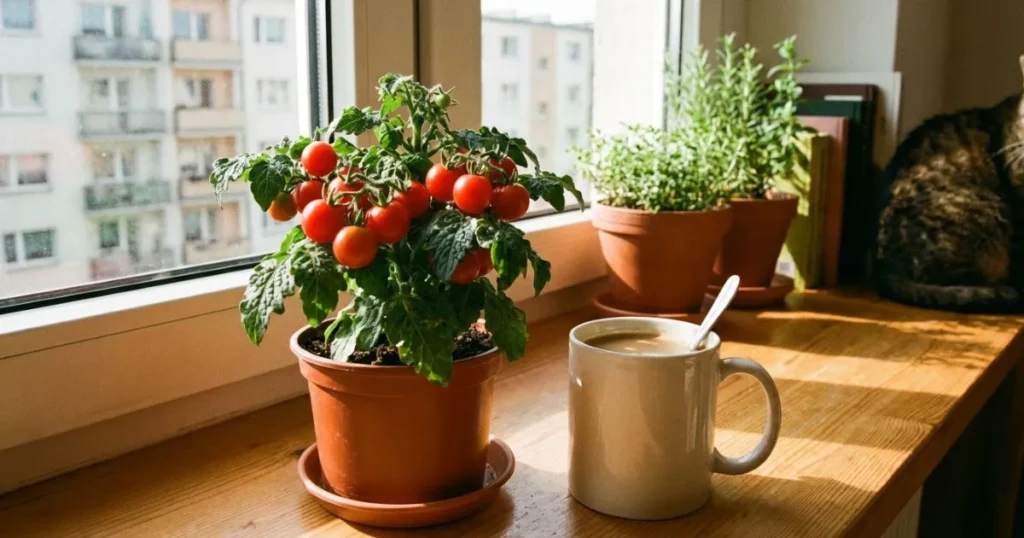
Whether you have a sprawling backyard garden waiting for spring or you are setting up a permanent corner for indoor gardening tomatoes, the journey begins the same way: with a seed and a plan. Here is your comprehensive guide to waking up those seeds and nurturing them into thriving, fruit-bearing plants.
Table of Contents
1. Timing is Everything: When to Start Your Seeds
Before you even touch a bag of soil, you need to look at the calendar. The timing of when you plant is just as critical as how you plant. If you start too early, you end up with giant, unruly monsters that outgrow their pots before it is warm enough to move them. If you start too late, you might miss the best of the summer sun.
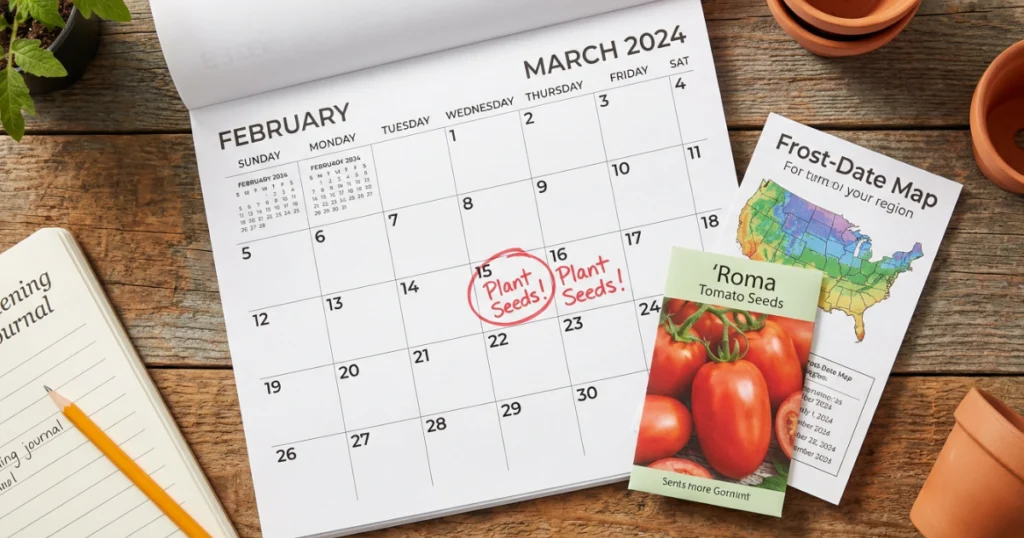
The general rule for how to start tomato seeds is to count backward. You want to plant your seeds 6 to 8 weeks before the last expected frost date in your area.
- For Outdoor Transplanting: If your last frost is May 1st, you should be planting your seeds indoors around mid-March. This gives the plant enough time to develop a strong root system without becoming root-bound.
- For Indoor Gardening: If you intend to keep your plants inside permanently as part of an indoor gardening tomatoes setup, you have total freedom. You can start seeds in January, July, or October. The seasons inside your home are defined by you, not the weather outside.
To find your specific dates, check out the Old Farmer’s Almanac Frost Date Calculator.
2. Selecting the Right Varieties for Indoors
One of the biggest mistakes beginners make is grabbing the first packet they see labeled “Delicious Tomato.” Not all tomatoes are built for the same environment. If you have limited space or are growing exclusively indoors, the genetics of the seed matter immensely.
Understanding Growth Habits
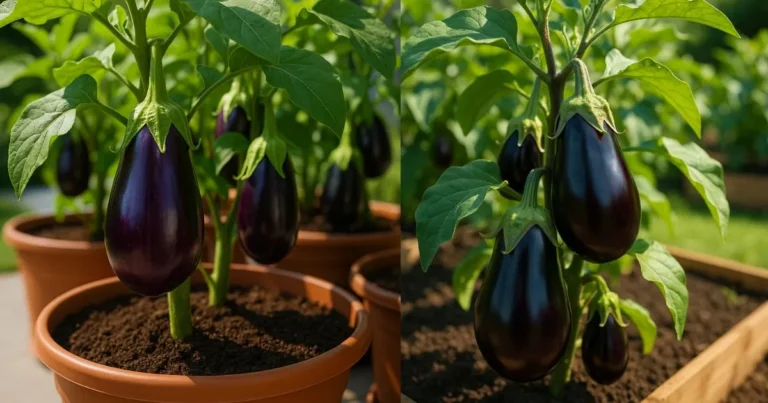
- Indeterminate (Vining): These plants grow indefinitely. They are vines that will keep getting taller and producing foliage until a frost kills them. They require heavy-duty trellises and can easily reach 8 to 10 feet. These are difficult to manage indoors.
- Determinate (Bush): These plants grow to a genetically determined height (usually 3-4 feet), set all their fruit at once, and stop growing. These are better for containers.
Why Micro-Dwarfs are King
For the ultimate indoor gardening tomatoes experience, look for Micro-Dwarf varieties. These are bred specifically to grow in small pots (6 inches to 1 gallon) and often stay under 12 inches tall. They are the apartment dweller’s dream.
Top Recommended Indoor Varieties:
- Tiny Tim: A classic heirloom that produces heavy yields of cherry tomatoes on a plant the size of a soccer ball.
- Orange Hat: An ultra-compact variety producing sweet, bright orange fruit.
- Red Robin: Known for being shade-tolerant and producing tomatoes that taste excellent even when grown under lights.
3. Gathering Your Essential Gear
You do not need a professional greenhouse to succeed, but you cannot rely on garden dirt and a solo cup, either. To mimic the conditions of a warm spring day inside your drafty house, you need a few specific tools.
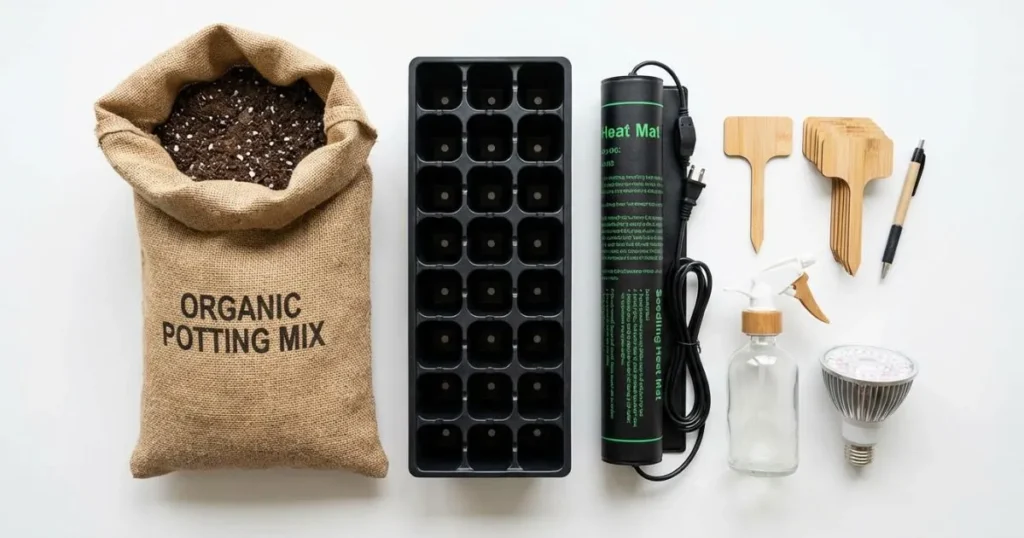
Soil, Containers, and Heat
- Sterile Potting Mix: This is non-negotiable. Do not go outside and dig up dirt. Outdoor soil is heavy, compacts easily in pots (suffocating roots), and carries fungus, weed seeds, and pests. Buy a bag of “Seed Starting Mix.” It is light, fluffy, and sterile.
- Containers: You can buy dedicated seed starting trays with humidity domes, or you can upcycle. Yogurt cups, egg cartons (if waterproof), or plastic takeout containers work well—provided you poke drainage holes in the bottom. If water cannot escape, your seeds will rot.
- Heat Mats: Tomatoes are tropical plants. They originate from South America. They love warmth. While they can germinate at room temperature (70°F), they thrive at 80°F. A seedling heat mat placed under your tray signals to the seed that spring has arrived, speeding up germination by days.
4. Step-by-Step Guide on How to Start Tomato Seeds
Now that you have your gear and your timing is set, it is time to get your hands dirty. Follow this process carefully to ensure high germination rates.
Preparation and Planting
- Pre-moisten the Soil: Dump your seed starting mix into a large bowl or bucket. Add warm water gradually and mix it with your hands. You want the texture of a wrung-out sponge. If you squeeze a handful, a drop or two of water should come out, but it shouldn’t be dripping wet. If the soil is dry when you plant, it will be hydrophobic and repel water later.
- Fill the Cells: Fill your containers with the moist soil. Tap the container gently on the table to settle the mix, but do not pack it down. Roots need air pockets to grow.
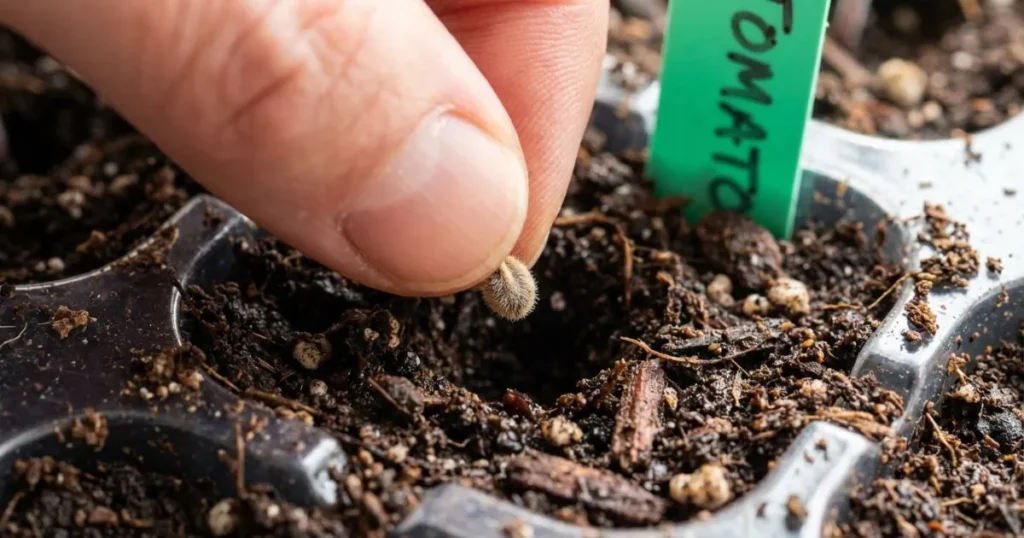
- The Planting Depth: Use a pencil or your pinky finger to make a small indentation in the center of the soil. The rule of thumb for how to start tomato seeds is to plant them about ¼ inch deep.
- Cover and Label: Lightly sprinkle more moist soil over the seed to cover it. Don’t forget to label your pots! You might think you will remember which one is the Roma and which is the Cherry, but in three weeks, they will all look identical.
The Greenhouse Effect
Once the seeds are in the dirt, you need to keep them humid. If you are using a seed starting kit, put the plastic dome on top. If you are using DIY cups, cover them loosely with plastic wrap. This traps moisture and creates a mini-greenhouse environment.
Place the tray on your heat mat. You do not need light yet—seeds germinate in the dark. Check them daily.
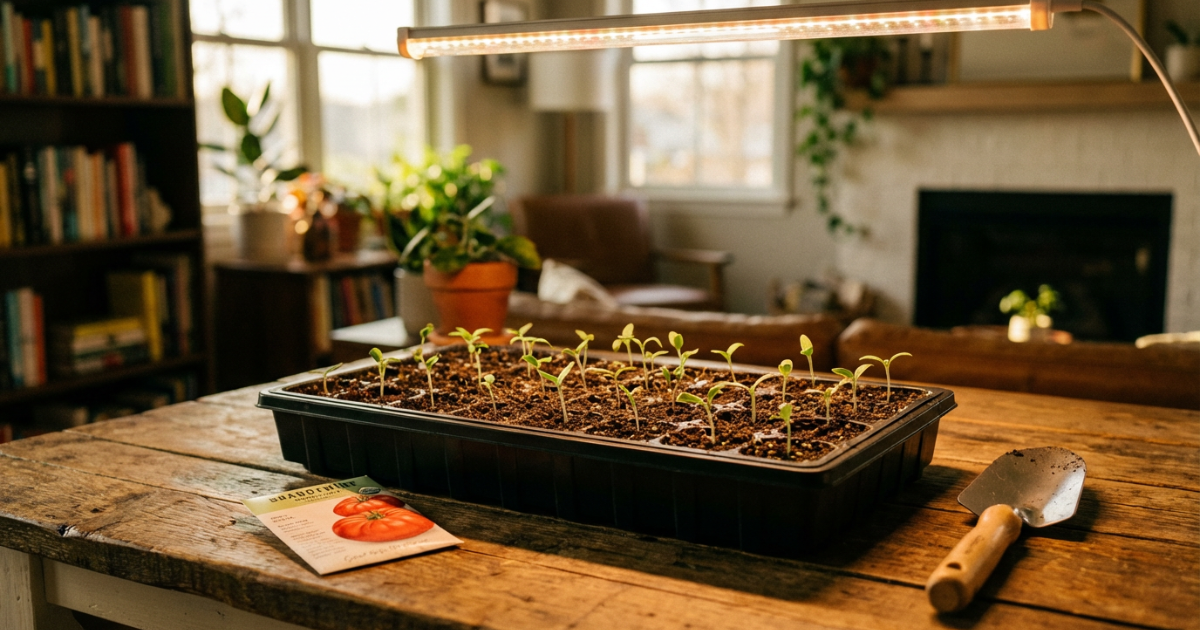
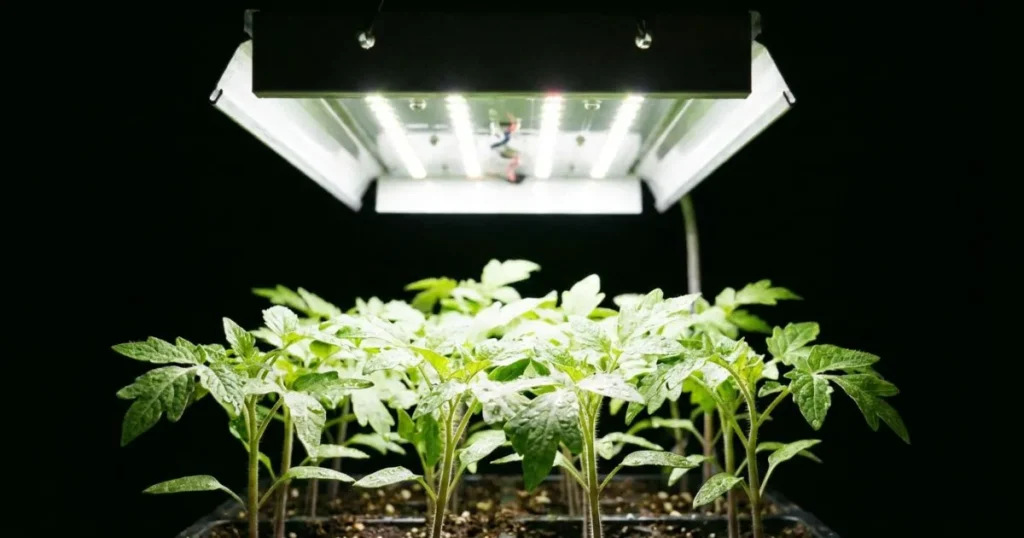
5. Light: The Secret to Stout Seedlings
The moment you see a tiny green loop (the “elbow”) break the surface of the soil, everything changes.
Remove the humidity dome and turn off the heat mat immediately. Now, the most critical factor is light.
Natural vs. Artificial Light
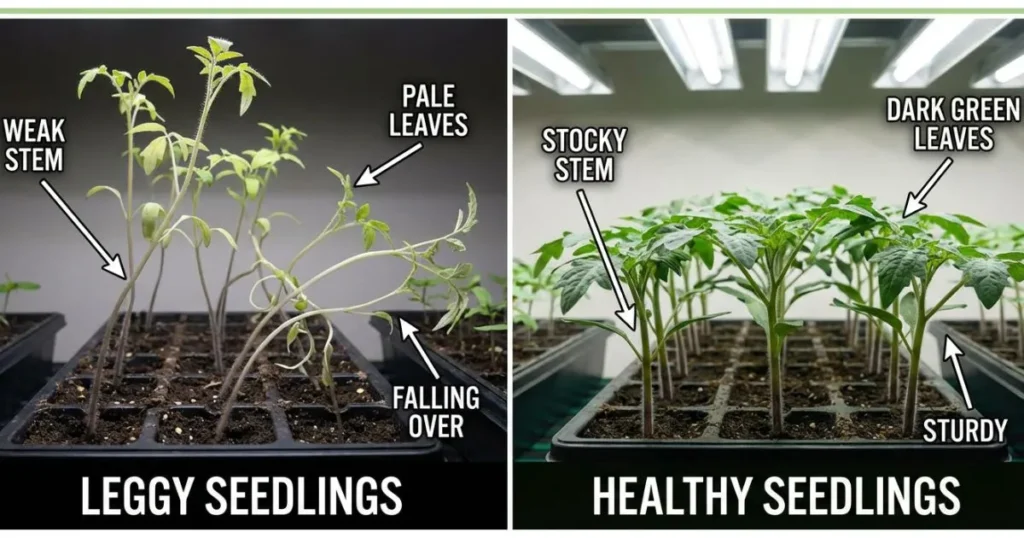
The number one issue people face when learning how to start tomato seeds is “legginess.” This is when the seedling stem becomes long, thin, and pale. It is the plant panicking, stretching desperately to find a light source.
- Windows are rarely enough: Even a south-facing window in winter has weak light intensity, and the glass filters out UV rays. Your plants will likely stretch toward the window.
- The Solution: Use artificial grow lights. You don’t need expensive purple lights; standard white LED shop lights (look for 5000K-6500K “Daylight” spectrum) work wonders for seedlings.
- Distance is Key: Position the lights 2 to 3 inches above the tops of the seedlings. Yes, that close. As the plants grow, raise the lights.
- Duration: Keep the lights on for 14 to 16 hours a day. Plants need a “night” cycle to respire, so use a simple outlet timer to turn them off while you sleep.
6. Watering and Feeding Your Seedlings
Your new babies are delicate. A blast of water from a watering can creates a chaotic flood that can dislodge the tiny roots or knock the plant over.
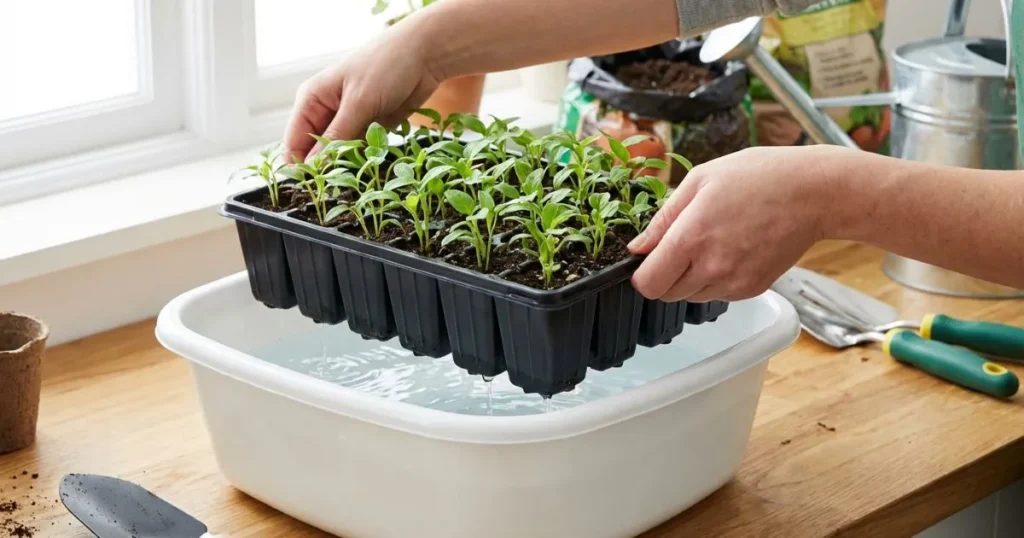
The Bottom-Watering Technique
Instead of watering from the top, place your seed pots inside a larger tray or dish. Pour water into the tray, not the pots. The dry soil will suck the water up through the drainage holes like a straw (this is capillary action).
Why do this?
- It encourages roots to grow down toward the moisture.
- It keeps the surface of the soil dry, which prevents mold and fungus from attacking the stem.
- It prevents water splashing soil onto the leaves, which can spread disease.
When to Fertilize
A seed contains a packed lunch of nutrients that sustains the plant for the first week or two. You will see two smooth, oval leaves appear first—these are called “cotyledons.”
Once the “true leaves” appear (the ones that actually look like jagged tomato leaves), the plant has eaten its packed lunch. It is now hungry. This is when you should introduce a water-soluble fertilizer, diluted to 1/4 strength. Do not use full strength, or you will burn the tender roots.
7. Troubleshooting: Common Seed Starting Issues
Even experienced gardeners run into trouble. Here is how to handle the most common problems when indoor gardening tomatoes.
Damping Off Disease
This is the heartbreak of the nursery. You check your plants in the morning, and they look great. By evening, the stem has pinched shriveled at the soil line, and the seedling has fallen over and died. This is a fungal infection called “damping off.”
- Prevention: It is caused by cool, wet, stagnant conditions. To prevent it, use sterile soil, don’t overwater, and run a small oscillating fan near your seedlings. The airflow toughens the stems and keeps the soil surface dry.
Helmet Head
Sometimes, the seed hull (the shell) gets stuck on the cotyledons and traps the leaves.
- The Fix: Do not pull it off dry! You will rip the head off your plant. Instead, put a drop of water on the shell to soften it. Wait 10 minutes, then gently try to slide it off. If it resists, apply more water and wait.
Purple Leaves
If the underside of your seedling leaves turns purple, it usually indicates a phosphorus deficiency. However, in seedlings, this is rarely because the soil lacks phosphorus—it’s usually because the soil is too cold, preventing the roots from absorbing nutrients. Check your room temperature; tomatoes hate anything below 60°F.
8. Potting Up and Long-Term Care
If you have done everything right, your seedlings will eventually outgrow their starter cells. You will know it is time when the roots start poking out of the bottom drainage holes or the plant has 2-3 sets of true leaves.

The Magic of Tomato Stems
When you move your baby plant to a larger pot (a process called “potting up”), you can do something unique to tomatoes.
Bury them deep.
Tomatoes have “adventitious roots,” meaning they can sprout roots from anywhere along their stem. When you transplant, pinch off the lowest set of leaves and bury the stem deep in the new soil, leaving only the top set of leaves exposed. The buried stem will turn into a massive root system, creating a sturdier, more drought-tolerant plant.
For indoor gardening tomatoes, you will likely move them from the seed cell to a 4-inch pot, and eventually to their “forever home” (a 5-gallon bucket or large pot).
From Seed to Sauce: A Simple Indoor Recipe
Months from now, when you have successfully navigated the journey of how to start tomato seeds, you will be rewarded with the ultimate prize: fresh fruit. While a sun-warmed tomato is perfect on its own, this simple recipe highlights the fresh, acidic punch of indoor-grown produce.
Fresh Basil & Tomato Bruschetta
This dish relies entirely on the quality of the ingredients—something your indoor garden will provide in spades.
| Ingredient | Quantity | Notes |
|---|---|---|
| Fresh Indoor Tomatoes | 2 Cups | Diced small (remove seeds if too watery) |
| Fresh Basil Leaves | 1/2 Cup | Chiffonade (rolled and sliced thin) |
| Garlic Cloves | 2 | Minced very finely (or grated) |
| Extra Virgin Olive Oil | 2 Tbsp | Use your best quality oil |
| Balsamic Vinegar | 1 Tbsp | Optional, for a touch of sweetness |
| French Baguette | 1 Loaf | Sliced on a bias and toasted |
| Sea Salt & Cracked Pepper | To Taste | Flaky salt adds a great crunch |
Instructions:
- Combine the diced tomatoes, basil, garlic, olive oil, and vinegar in a bowl.
- Let the mixture sit at room temperature for 15-20 minutes. This allows the juices to mingle and the flavors to marry.
- Toast your baguette slices until golden.
- Spoon the mixture generously onto the warm bread.
- Finish with a sprinkle of flaky sea salt right before serving.
FAQ: Common Questions on How to Start Tomato Seeds
Q: How long does it take for tomato seeds to germinate?
A: It depends heavily on temperature. On a warm heat mat (80°F), you might see sprouts in 3 to 5 days. At cooler room temperatures (65-70°F), it can take 7 to 14 days. Be patient, but if nothing happens after two weeks, the seeds may be duds or the soil was too cold/wet.
Q: Do I need to soak tomato seeds before planting?
A: It is not strictly necessary. Tomato seeds are small and have relatively thin coats compared to things like beans or peas. However, soaking them in warm water for 12 hours before planting can soften the hull and potentially speed up germination by a day or two.
Q: Why are my tomato seedlings falling over?
A: If the stem looks shriveled and brown at the soil line, it is Damping Off (fungus). Throw the soil and plant away; sanitize the pot. If the stem looks green and healthy but just tall and floppy, it is legginess caused by low light. You can try to save it by burying the stem deep when you transplant it.
Q: Can I learn how to start tomato seeds without grow lights?
A: You can, but it is challenging. You need a very bright south-facing window that receives unobstructed sun for most of the day. You will also need to rotate the pots 180 degrees every day, as the plants will bend aggressively toward the glass. Even then, they may end up tall and spindly compared to light-grown plants.
Q: Do I need to thin my seedlings?
A: Yes! If you planted two or three seeds in one pot and they all sprouted, you must play the villain. Snip off the smaller, weaker seedlings at the soil line with scissors. If you try to separate their roots, you risk killing them all. You want one strong plant per pot, not three weak ones fighting for nutrients.
Conclusion
There is a unique pride that comes from eating a meal you grew from scratch. When you learn how to start tomato seeds, you aren’t just saving money on produce; you are participating in a cycle of life that connects you to the seasons, even if you are growing in a basement in the middle of winter.
From that first exciting moment when the green loop breaks the soil surface, to the careful dance of light and water, and finally to the harvest, indoor gardening tomatoes rewards you with flavor that simply cannot be bought. It requires patience and attention, but the result is a little slice of summer that belongs entirely to you.
So, don’t let the winter gray get you down. The garden season doesn’t start when the frost melts outdoors; it starts the moment you decide to plant a seed indoors.