Planting Potatoes in Containers: A Complete Guide for Home Gardeners
Imagine lifting the soil from a simple garden pot and discovering a cluster of smooth, golden potatoes — ones you grew yourself. There’s a moment of pure satisfaction when you realize that you don’t need a backyard or a large plot of land to enjoy that experience. All you need is a container, a few seed potatoes, and a little bit of care.
Planting potatoes in containers is one of the simplest and most rewarding forms of gardening. It’s perfect for you if you live in an apartment, have limited space, or simply want to grow your own food in a controlled environment. In this guide, you’ll learn everything you need to know — from selecting the best containers and soil to harvesting and even cooking your freshly grown potatoes.
Table of Contents
Why Choose Container Potato Gardening
Planting potatoes in containers gives you flexibility and control that traditional gardening can’t. You decide where, when, and how your plants grow — and you can do it all without a backyard.
Here’s why this method is becoming so popular:
- Ideal for small spaces: Containers fit perfectly on balconies, patios, and porches.
- Better pest control: Growing potatoes in containers helps you avoid soil-borne diseases and common garden pests.
- Easier harvesting: Instead of digging through the ground, you simply tip the container and collect your potatoes.
- Custom soil quality: You choose exactly what goes into your soil — no more poor, rocky garden soil.
- Sustainable gardening: Reuse old buckets, bags, or barrels for a zero-waste approach.
Many urban gardeners and horticultural experts, including those from the Royal Horticultural Society, recommend container growing because it allows full control over soil composition and water levels. You’ll be surprised how much you can grow in just a few square feet.
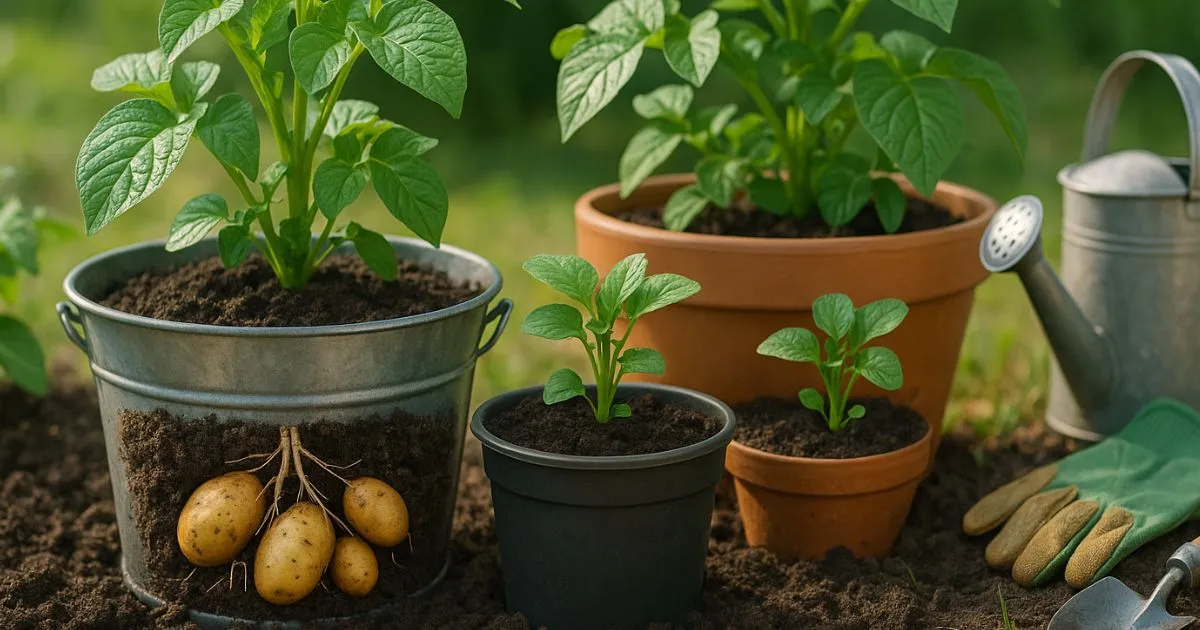
Choosing the Best Container for Potatoes
When planting potatoes in containers, your choice of pot is crucial. Potatoes need room to develop underground tubers and enough drainage to stay healthy.
Container Size and Depth
- Depth: Choose a pot at least 16 to 18 inches deep.
- Width: A 12–14-inch-wide container is perfect for one or two potato plants.
- Drainage: Make sure the container has several holes at the bottom to prevent waterlogging.
Best Container Materials
| Container Type | Advantages | Drawbacks |
|---|---|---|
| Plastic Buckets | Inexpensive, lightweight, and easy to move | Can overheat in direct sunlight |
| Fabric Grow Bags | Excellent aeration and drainage | Dry out faster and need frequent watering |
| Wooden Boxes | Great insulation and rustic charm | Heavier and harder to move |
| Metal Containers | Durable and stylish | May rust or retain too much heat |
Pro Tip: If your container doesn’t have holes, drill some. Elevate it slightly using small bricks or blocks to improve airflow and drainage.
Selecting the Right Potato Variety
Not every potato variety thrives in containers. The trick is to choose compact, early-maturing types that don’t require a deep root zone.
Best Potato Varieties for Containers
- Yukon Gold: Creamy texture and reliable yields.
- Red Norland: Early harvest and smooth skin.
- Charlotte: Ideal for salads and small containers.
- Fingerlings: Compact and flavorful, perfect for limited space.
Avoid late-season or maincrop varieties, which need more room and time to mature.
Seed Potatoes vs. Store-Bought
Always use certified seed potatoes. These are disease-free and bred specifically for planting. Store-bought potatoes often contain growth inhibitors that can prevent proper sprouting.
Chitting (Pre-Sprouting) Potatoes
Before planting, let your seed potatoes sprout — a process called chitting. Place them in a cool, bright area for two to three weeks until the sprouts reach about one inch long. This gives your plants a head start and leads to an earlier harvest.
Preparing the Perfect Soil Mix
Potatoes love soft, loose, and nutrient-rich soil. Garden soil alone tends to compact, restricting tuber growth, so you’ll need to mix your own blend.
Ideal Soil Mix for Container Potatoes
Use this mix for best results:
- 60% quality potting mix
- 30% compost or aged manure
- 10% perlite or coco coir for aeration
The soil should be slightly acidic — aim for a pH between 5.5 and 6.5. Avoid adding too much nitrogen, which can lead to lush foliage but few potatoes.
Fertilizing Your Potatoes
- Mix a balanced, slow-release fertilizer (10-10-10 NPK) into your soil before planting.
- Feed your plants every two to three weeks with compost tea or liquid seaweed fertilizer.
- Mid-season, top off with fresh compost to maintain nutrition.
Healthy soil equals healthy, abundant potatoes.
Step-by-Step Guide to Planting Potatoes in Containers
Step 1 – Prepare the Container
- Add a one-inch layer of gravel or small stones to improve drainage.
- Fill with about four to six inches of your soil mix.
- Water lightly to moisten the soil before planting.
Step 2 – Plant the Seed Potatoes
- Place two or three chitted potatoes with the eyes facing upward.
- Space them evenly to give each plant room to grow.
- Cover with four inches of soil.
Step 3 – Watering and Sunlight
- Potatoes need consistent moisture — water when the top inch of soil feels dry.
- Ensure your container gets at least 6–8 hours of sunlight daily.
- Rotate the pot occasionally so all sides receive equal light.
Step 4 – The Hilling Process
As your potato plants grow, you’ll need to “hill” them — a simple technique that boosts yield.
- When plants reach 6–8 inches tall, add soil until only the top leaves are visible.
- Repeat every two to three weeks until the container is nearly full.
This encourages tuber growth along buried stems.
Step 5 – Maintenance and Care
- Remove yellow or damaged leaves.
- Watch for pests like aphids or spider mites.
- Use neem oil or insecticidal soap if necessary.
- Don’t let the soil dry out — potatoes love even moisture.
Step 6 – Harvesting Time
You’ll know it’s time to harvest when the leaves begin to yellow and die back. Stop watering for two weeks before harvesting. Then gently tip the container onto a tarp and gather your potatoes by hand.
Few moments in gardening compare to finding those first golden tubers hidden beneath the soil — it’s like unearthing buried treasure.
Common Potato Problems and Easy Fixes
Even the best gardeners face challenges. Here’s how to handle the most common potato-growing problems.
Overwatering and Root Rot
Symptoms: Yellow leaves, wilting, or soggy soil.
Fix: Ensure your container drains properly and allow the top layer of soil to dry before watering again.
Pest Infestations
Common pests: Aphids, mites, and potato beetles.
Fix: Spray neem oil weekly or introduce beneficial insects like ladybugs.
Nutrient Deficiency
Symptoms: Pale, weak plants.
Fix: Add compost or apply a balanced organic fertilizer mid-season.
Heat Stress
Symptoms: Wilting during midday heat.
Fix: Move containers to partial shade or cover with a breathable shade cloth.
Container potato gardening is forgiving — small adjustments usually lead to quick recovery.
Harvesting and Storing Your Potatoes
When to Harvest
Potatoes are ready to harvest when the foliage starts to yellow and wither. For new, tender potatoes, you can harvest early — about 8–10 weeks after planting.
How to Harvest
- Stop watering 10–14 days before harvest.
- Gently turn over the container and sift through the soil.
- Collect the potatoes and remove any remaining debris.
How to Store Your Potatoes
- Cure them in a cool, dark place for 3–5 days.
- Store in paper or burlap bags to allow airflow.
- Keep away from direct sunlight to prevent greening.
Properly stored, your potatoes will stay fresh for months.
Simple Recipe Using Your Homegrown Potatoes
After weeks of tending your plants, it’s finally time to taste the results. Here’s a quick and delicious recipe to celebrate your harvest.
Garlic Herb Baby Potatoes
| Ingredient | Quantity |
|---|---|
| Small Potatoes | 1 lb |
| Olive Oil | 2 tbsp |
| Garlic (minced) | 3 cloves |
| Fresh Parsley or Thyme | 1 tbsp |
| Salt & Pepper | To taste |
Instructions:
- Boil the potatoes until tender, then drain.
- Heat olive oil in a pan and add garlic.
- Toss the potatoes in the garlic oil and herbs.
- Roast or sauté until golden brown.
This simple, rustic dish brings out the natural sweetness of your homegrown potatoes.
FAQs About Planting Potatoes in Containers
How many potatoes can I grow in one container?
Two to three seed potatoes per 10–15-gallon container is ideal.
How long does it take to grow potatoes in containers?
Early varieties take about 70–90 days, while later ones can take up to 120 days.
Can I reuse my soil next year?
It’s better to replace or refresh the soil with compost each season to prevent disease buildup.
Do potatoes need full sun?
Yes, potatoes grown in containers need 6–8 hours of sunlight daily.
Can I grow potatoes indoors?
Yes, as long as you provide bright light or use grow lamps for at least 8 hours a day.
Conclusion: Start Planting Potatoes in Containers Today
Planting potatoes in containers isn’t just about growing food — it’s about discovering how little space you truly need to live more sustainably. Whether you’re in an apartment, on a balcony, or simply experimenting with container gardening, you can grow your own fresh potatoes right at home.
Each sprout, each bloom, and each harvest connects you to something simple and grounding — the process of nurturing life. So grab a container, mix your soil, and plant your first seed potatoes today. You’ll be amazed by what you can grow in just one pot.
Your harvest awaits — and the satisfaction of tasting homegrown potatoes will make every moment worth it.